Capture the Action Smartly: Your Guide to 5 GoPro Labs Capture Triggers

The content on this blog may contain affiliate links. If you choose to purchase through these links, I may receive a commission at no extra cost to you. Thank you for supporting my work!
How to use GoPro Labs Triggers
Dive deep into the dynamic world of GoPro Labs capture triggers in this comprehensive guide. Whether you are a seasoned GoPro user or a newbie, understanding these triggers can revolutionize your capturing experience.
In this GoPro Labs tutorial, we will cover a range of features, from utilizing the image sensor for motion detection to leveraging the GPS speed triggers. Stay tuned as we unravel the functionalities of GoPro Labs triggers one by one.
Getting Started with GoPro Labs Capture Triggers: Prerequisites
Before we delve into the nitty-gritty of GoPro Labs capture triggers, it’s essential to ensure your GoPro camera is compatible with the features discussed in this blog post. Here is a table showcasing the compatibility:
| Feature | Compatible GoPro Models |
|---|---|
| Image Sensor for Motion Detection | HERO7-12, MAX, Bones |
| IMU Motion Triggers | HERO7-12, MAX, Bones |
| USB Power Trigger (pseudo dash-cam mode) | HERO7-12, MAX |
| Sound Pressure Level Trigger | HERO9-12, Bones |
| GPS Speed Triggers | HERO7-11, MAX |
To make the most of these features, ensure your GoPro has the latest GoPro Labs firmware installed. Additionally, we recommend having the GoPro Labs mobile app QRControl installed on your device for a smoother user experience.
Harnessing GoPro Labs Motion Detection with the Image Sensor
In the ever-evolving landscape of GoPro Labs features, the GoPro Labs motion detection stands as a revolutionary tool, leveraging the high-resolution image sensor of the camera to initiate and cease captures based on detected motion. This feature is designed to work even when the camera is not recording, identifying differences between video frames to detect motion.
To set up this feature, it is vital to mount your camera in a stationary position to avoid false triggers from camera movements. The motion detection can be customized to your preference, with settings including:
- Sensitivity: Ranging from 1 (low) to 9 (very high)
- Start Delay: A 4-second delay to allow you to move out of the frame
- Hold Time: Continues recording for 5 seconds after motion has ceased
- Motion Mask: A tool to ignore constant movements in the frame, with the ability to “paint” out regions to ignore, available for HERO9/10/11 models
For HERO10 users, it is essential to keep the LCD on, with recommended settings to reduce brightness to 10% for extended captures. The motion detection feature is compatible with video, TimeWarp, and Timelapse Video modes, offering a versatile tool for your GoPro Labs motion detection manual needs.
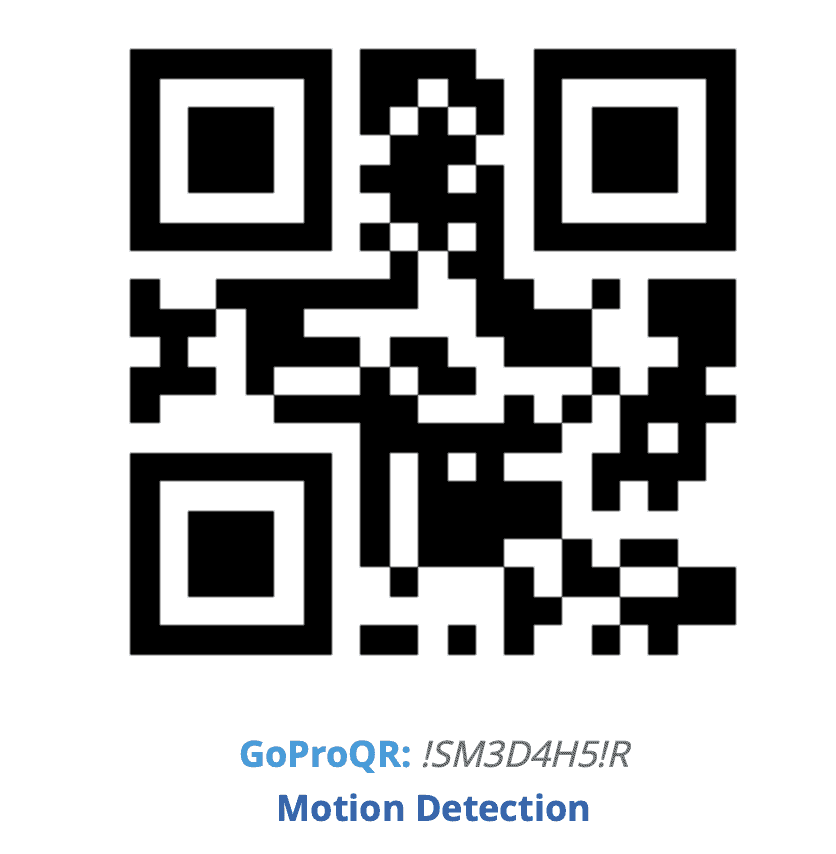
However, it is important to note the limitations, including incompatibility with certain high-resolution and high-frame-rate modes. For optimal functionality, it is recommended to use modes like 4Kp30, 2.7Kp60, or 1080p120.
To aid in finding the perfect shot amidst potential false positives, the camera creates a JPEG showing the detected motion area, stored in the MISC folder, helping you quickly identify the videos you desire.
For those looking to delve deeper, the GoPro Labs guide offers insights into creating custom motion masks, a feature compatible with Labs enabled HERO7 to HERO12, MAX, and BONES models.
Discover the full potential of GoPro motion activation with this feature, transforming your GoPro into a motion-sensitive powerhouse, ready to capture the vibrant dynamics of life with precision and ease.
Leveraging IMU Motion Triggers for Smart Captures
The IMU Motion Triggers feature in GoPro Labs offers a smart solution to start and stop captures based on the motion of the camera itself. Utilizing the Inertial Measurement Unit (IMU), which comprises a gyroscope and accelerometer to measure rotation and linear acceleration, this feature can be a game-changer, especially in drone applications where it can automatically stop recording when motion ceases.
Here are the key aspects of setting up and using IMU motion triggers:
- Sensors: Choose between GYRO, ACCL, or both to detect motion.
- Sensitivity: Customize the start and end sensitivity on a scale of 1 (low) to 9 (high) to suit your needs.
- Start Delay: Set a delay, for instance, 1 second before the recording starts post motion detection.
- Hold Time: Determine a hold time, such as 5 seconds, to continue recording after the motion has stopped.
- Repeat: Enable the option to repeat IMU triggered captures.
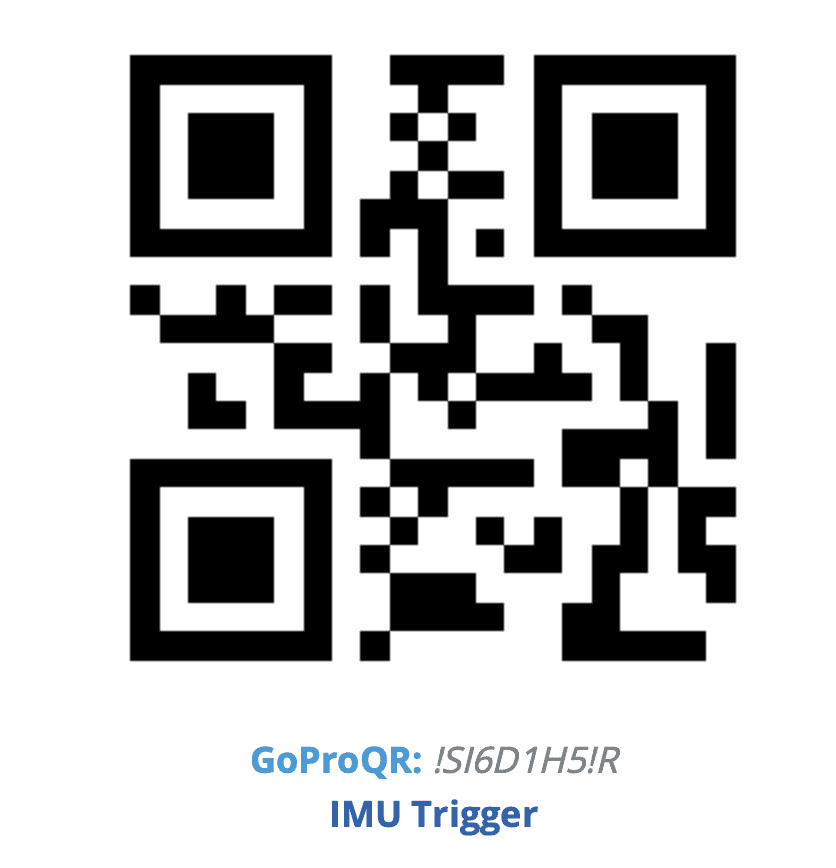
This feature is compatible with Labs enabled HERO7 to HERO12, MAX, and BONES models, offering a versatile tool to automate captures based on motion, enhancing efficiency, and focusing on moments that truly matter.
Setting Up GoPro Labs USB Power Trigger for Pseudo Dash-Cam Mode
The GoPro Labs USB Power Trigger feature offers a convenient way to automate your GoPro camera’s operations, transforming it into a pseudo dash-cam. This feature leverages the switching on of USB power to boot the camera and perform a predefined action, enhancing the ease of use in various settings, including vehicle dash-cam setups.
Here are the essential details to set up and use this feature:
- Command to Perform: Utilize commands such as
!Sto start capture in the camera’s default mode. You can create your own commands using the GoPro QR Code Creator or with QRControl. - Start and End Timing: The default setting initiates the command 0 seconds after USB power is on and ends it 10 seconds after the USB power is off.
- Battery Requirement: Note that a battery is required as the camera needs to close captured video when power is removed. It is recommended to have a spare battery for extended use to prevent battery discharge.
The GoPro Labs USB power trigger manual suggests using the following QR code to set up this feature:
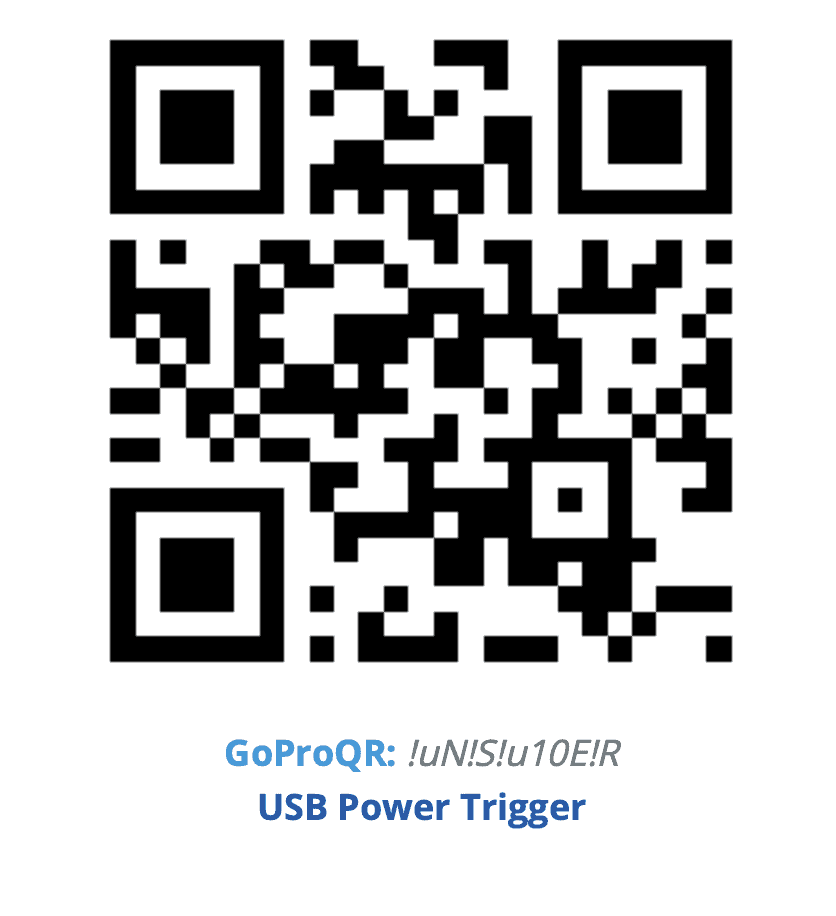
This feature is compatible with Labs enabled HERO7 (limited), HERO8, HERO9, HERO10, HERO11, HERO12, and MAX models, offering a versatile tool for automated captures based on USB power triggers.
Discover how to use GoPro Labs USB power trigger to enhance your capturing experience, bringing in automation and ease to your GoPro adventures.
Side Note: To facilitate the use of this feature in a car setting, consider using a reliable windshield mount for your GoPro. I recommend the

Mastering GoPro Labs Sound Pressure Level Trigger Setup
The GoPro Labs Sound Pressure Level Trigger is a remarkable feature that leverages the sound pressure level (SPL) detected by the camera to initiate and cease captures. This trigger can be a boon in scenarios with uncertain start times, such as rocket launches, where it can automatically start capturing when the engines fire.
Here are the essential details to guide you in setting up and using this feature:
- Start and End Sensitivity: Define the decibel levels to start and stop the capture. For instance, setting it to start at 80 dB or above and stop at 80 dB or below.
- Start Delay: Set a delay, such as 1 second before the system starts reading the audio level to avoid false triggers.
- Hold Time: Determine a hold time, like 5 seconds, to continue recording even after the audio level has dropped.
- Repeat: Enable the option to repeat SPL triggered captures for continuous utility.
The SPL can be customized with various sensitivity examples, ranging from a calm room at 30 dB to a horn at 120 dB, offering a wide spectrum to experiment with and find the perfect setting for your needs.
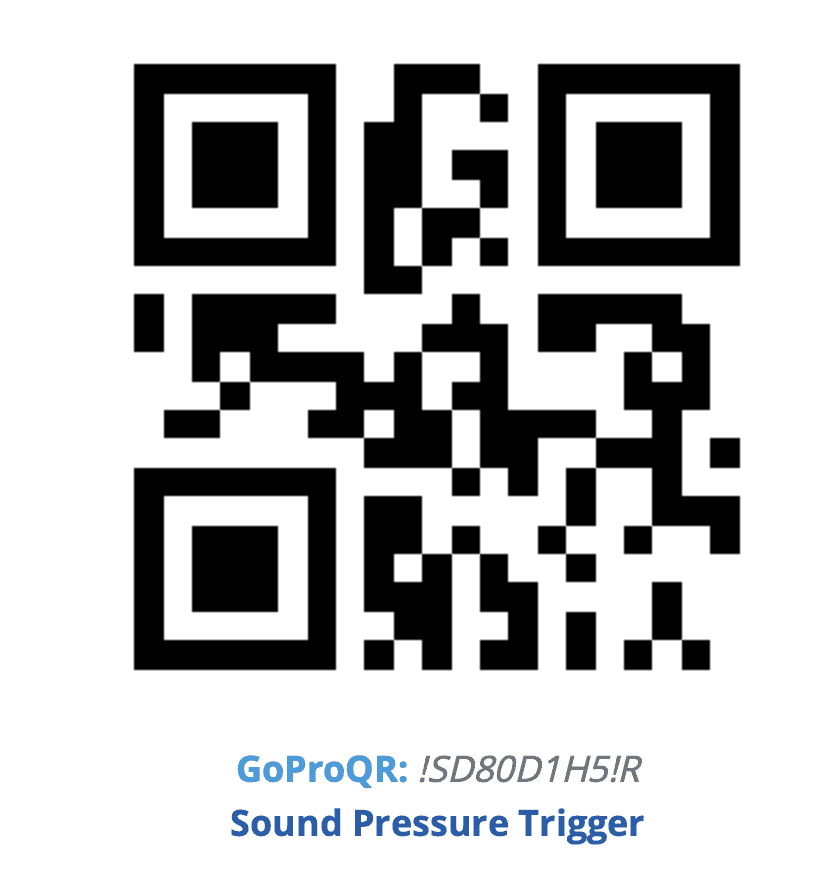
This feature is compatible with Labs enabled HERO9, HERO10, HERO11, HERO12, and BONES models, offering a versatile tool for automated captures based on sound pressure levels.
Discover how to use GoPro Labs sound pressure level trigger to enhance your capturing experience, bringing in automation and ease to your GoPro adventures.
Navigating GoPro Labs GPS Speed Triggers for Dynamic Captures
The GoPro Labs GPS Speed Triggers feature leverages the GPS functionality in your GoPro to initiate and cease captures based on speed thresholds. This feature can be a vital tool in scenarios such as track days, where you wish to record only when driving at a certain speed.
Here are the essential details to guide you in setting up and using this feature:
- Start and End Speed: Define the speed thresholds to start and stop the capture. For instance, setting it to start at 60 km/h (37 mph) and stop at 0 km/h (0 mph), with 0 indicating either turning off the feature or setting a speed threshold.
- Hold Time: Set a hold time, such as 5 seconds, to continue recording even after the speed has dropped below the threshold.
- HERO10 Note: For HERO10 users, it is essential to keep the LCD on, with recommended settings to reduce brightness to 10% for extended captures. Disabling auto power off and leaving the LCD on are necessary steps for successful GPS triggers on HERO10.
- Repeat: Enable the option to repeat speed triggered captures for continuous utility.
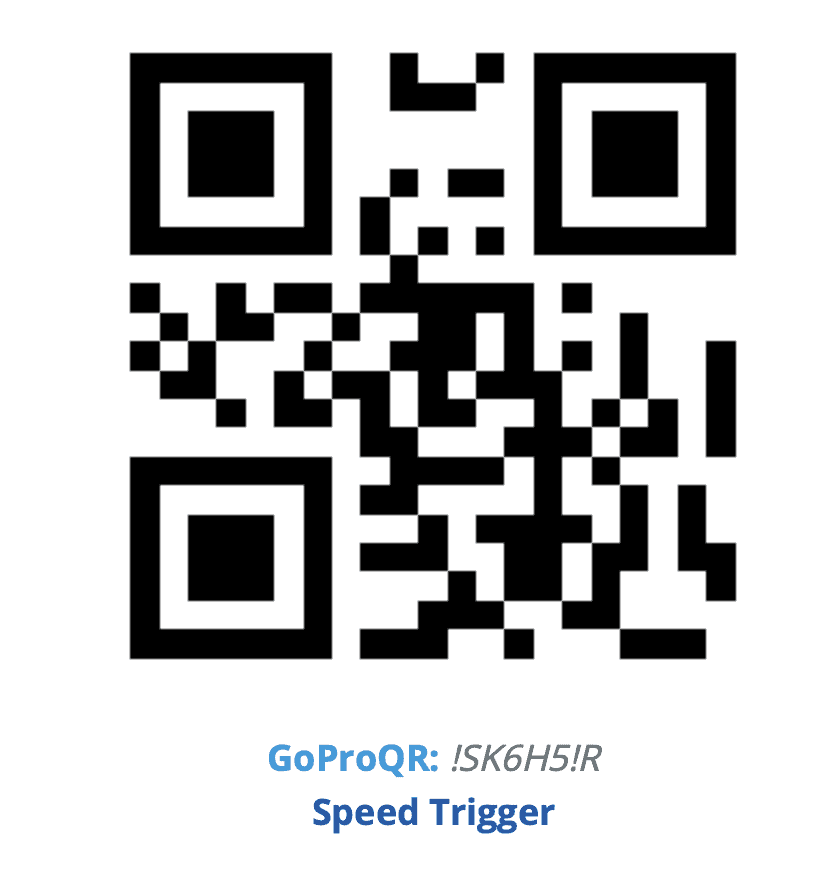
This feature is compatible with Labs enabled HERO7 to HERO11, MAX, and offers a versatile tool for automated captures based on speed thresholds, adding a dynamic perspective to your GoPro adventures.
Conclusion: Elevate Your Captures with GoPro Labs Capture Triggers
As we wrap up this comprehensive guide on GoPro Labs capture triggers, we trust that you are now equipped with the knowledge to leverage these innovative features to their fullest potential. From utilizing your GoPro camera for motion detection to setting up GPS speed triggers, we have covered a spectrum of functionalities that promise new creative ways to use your GoPro camera.
Remember, each feature comes with its unique setup and customization options, offering you the flexibility to tailor your captures to your preferences. Refer back to the individual sections for a detailed GoPro Labs capture triggers setup guide, ensuring you are well-prepared to embark on your capturing adventures.
As you venture into the world of GoPro Labs, don’t forget to explore our other blog posts for a deeper understanding of GoPro Labs features and functionalities. Whether you are looking to set up a sound pressure level trigger or curious about the IMU motion triggers, our blog is your go-to resource for all things GoPro Labs.
Further Reading
- GoPro Labs: 51 Features You Didn’t Know Your Camera Had
- The 2023 QRControl Guide to Mastering the GoPro Labs Mobile App in 10 Steps
- Your Overview of GoPro Labs Features and Camera Compatibility
- Master the GoPro Labs Update for PC in 4 Easy Steps (2023 Edition)
- GoPro Labs Reset: Your How-To Guide for a Fresh Start
- How to Remove GoPro Labs Firmware on PC: A Step-by-Step Guide


